Director:
Rating: "; } else { echo "
 ";
}
}
?>
";
}
}
?>
На основе https://toster.ru/q/276441 Понятное дело, многое зависит от проекта, поэтому данный пост стоит адаптировать под ваш случай.
* Безопасность:
- Каждый аргумент метода простого типа должен проверяться на тип в случае его проксирования и на граничные значения в случае обработки. Чуть что не так - бросается исключение. Если метод с несколькими аргументами на 80% состоит из поверки из аргументов - это вполне нормально))
- Никаких trigger_error, только исключения.
- Исключения ДОЛЖНЫ быть человеко-понятны, всякие "Something went wrong" можно отдавать пользователю, но в лог должно попасть исключение со стектрейсом и человеко-понятным описанием, что же там пошло не так.
- Каждый аргумент (объект) метода должен быть с тайпхинтингом на этот его класс, или интерфейс.
- За eval как правило жесткий выговор
- @ допускается только в безвыходных ситуациях, например проверка json_last_error.
- Перед работой с БД - обязательная проверка данных.
- Никаких == и!=. Со swtich - единственное исключение, по ситуации.
- Если метод возвращает не только bool, а еще что-то - жесткая проверка с ===, или!== обязательна.
- Никаких условий с присваиваниями внутри. while($row = ...) - тоже недопустимо.
- Магические геттеры/сеттеры разрешаются только в безвыходных ситуациях, в остальном - запрещены.
- Конкатенации в sql - только в безвыходных ситуациях.
- Параметры в sql - ТОЛЬКО через плейсхолдеры.
- Никаких глобальных переменных.
- Даты в виде строки разрешаются только в шаблонах и в БД, в пхп коде сразу преобразуется в \DateTimeImmutable (в безвыходных ситуациях разрешено \DateTime)
- Конечно зависит от проекта, но как правило должно быть всего две точки входа: index.php для web и console(или как-то по другому назваться) - для консоли.
* Кодстайл PSR-2 + PSR-5 как минимум, + еще куча более жестких требований (для начала все то что в PSR помечено как SHOULD - становится MUST)
- В PhpStorm ни одна строчка не должна подсвечиваться (исключением является typo ошибки, например словарик не знает какой-то из аббревиатур, принятых в вашем проекте). При этом разрешается использовать /** @noinspection *** */ для безвыходных ситуаций.
- Если кто-то говорит, что пишет в другом редакторе и у него не подсвечивается, все равно отправляется на доработку.
* Организация кода:
- Никаких глобальных функций.
- Классы без неймспейса разрешаются только в исключительно безвыходных ситуациях.
* Тестируемость (в смысле простота тестирования) кода должна быть высокая.
- Покрытие кода обязательно для всех возможных кейсов использования каждого публичного метода с моками зависимостей.
* Принципы MVC:
- Никаких обработок пользовательского ввода в моделях, от слова совсем.
- Никаких запросов в БД из шаблонов.
- Никаких верстки/js/css/sql-ин в контроллерах.
- В моделях НИКАКОЙ МАГИИ, только приватные свойства + геттеры с сеттерами.
- В моделях разрешено использовать метод save(при наличии такого разумеется) только в исключительных ситуациях. Во всех остальных - либо insert, либо update.
* Принципы SOLID:
- Никаких универсальных объектов, умеющих все.
- Если метод для внутреннего пользования - private, никаких public.
- Статические методы разрешаются только в случае безвыходности.
* Принцип DRY разрешено нарушать в случаях:
- Явного разделения обязанностей
- В тестах (каждый тест должен быть независимым, на сколько это возможно)
* Работа с БД:
- Запрос в цикле должен быть РЕАЛЬНО обоснован.
- За ORDER BY RAND() жесткий выговор
- Поиск не по ключам (конечно если таблица НЕ на 5 строк) запрещен.
- Поиск без LIMIT (опять же если таблица НЕ на 5 строк) запрещен.
- SELECT * - запрещен.
- Денормализация БД должна быть обоснована.
- MyISAM не используется (так уж)))
- Множественные операции обязательно в транзакции, с откатом если что-то пошло не так.
- БД не должна содержать бизнес логики, только данные в целостном виде.
- Не должно быть нецелесообразного дерганья БД там, где без этого можно обойтись.
* Кэш должен очищаться по двум условиям (не по одному из, а именно по двум):
- Время.
- Протухание по бизнес логике.
Разрешается по только времени в безвыходных ситуациях, но тогда время - короткий период.
- При расчете ключей кэша должна использоваться переменная из конфигурации приложения (на случай обновлений кэш сбрасывается кодом, а не флашем кэш-сервера). В случае использования множества серверов - это очень удобный и гибкий инструмент при диплое.
* О людях:
- "Я привык писать так и буду дальше" - не вопрос, ревью пройдешь только когда поменяешь свое мнение.
- "Я пишу в vim-е и мне так удобно" - здорово, код консолью я тоже в нем пишу)) но есть требования к коду, если в них не сможешь - не пройдешь ревью.
- "Я скопировал этот страшный метод и поменял 2 строчки" - это конечно замечательно, но по блейму автор всего этого метода ты, так что давай без ерунды, хорошо?
- "Оно же работает!" - вот эта фраза переводится примерно так: "да, я понимаю, что пишу полную ерунду, но не могу писать нормально потому, что не могу", я правильно тебя понял?))
- "У меня все работает!" - рад за тебя, а как на счет продакшна?
- "Там все просто" - не используй слово "просто", от слова "совсем". Вот тебе кусок кода (первого попавшегося со сложной бизнес логикой), где там ошибка (не важно есть она, или нет)? Ты смотришь его уже 2 минуты, в чем проблема, там же все "просто"))
* Всякое:
ActiveRecord (это я вам как в прошлом фанат Yii говорю) - полный отстой, примите за исходную. По факту у вас бесконтрольно по проекту гуляют модельки с подключением к БД. Не раз натыкался на то, что в тех же шаблонах вызывают save, или update (за такое надо сжигать).
Основное:
1. Наличие критических ошибок и устаревших функций.
2. Использование паттернов, элегантность решений.
3. Читабельность кода, наличие коментариев, наличие доков.
4. Соблюдение парадигм и соглашений (например, нарушение MVC).
Второстепенно\непринципиально:
1. Быстродействие кода (за исключением хайлоад)
2. Потребление памяти (за исключением бигдаты)
3. Эфективность SQL запросов (за исключением совсем уж несуразных)
4. Избегание в данных момент неважных, но потенциально узких мест (например замедление работы файловой системы при большом количестве картинок в папке аплоада)
5. Новизна примененых технологий.
6. Оправданое\Неоправднанное\Избыточное Велосипедирование.
WordPress создан для кастомизации. Он был создан таким образом, что каждую его часть можно настроить. В этом руководстве мы расскажем об одной из самых мощных возможностей WordPress, известную как пользовательские типы записей , и о том, как WordPress достиг высот с появлением этой замечательной возможности.
| Скачать исходники |
Предположим, вы хотите сделать на вашем блоге отдельный раздел для кино-рецензий. Используя пользовательские типы записей, вы можете создать новый тип вроде Записи или Страницы , который будет содержать другой набор данных. У него будет свое меню администратора, отдельные страницы редактирования, своя таксономия и другие возможности, необходимые для полноценных публикаций.
Пользовательские типы записей - новый набор административных настроек, которые используются наряду со стандартными типами, такими как Записи , Страницы , Прикрепленные файлы и так далее. Пользовательский тип записей может хранить любой тип информации. У него есть свой редактор и медиа-загрузчик. Он использует существующую структуру таблиц WordPress для простого управления данными. Главное преимущество создания пользовательских типов записей с помощью WordPress API - это удобное использование с существующими темами и шаблонами. Пользовательские типы записей также SEO-дружественны из-за своих постоянных ссылок.

Пользовательские типы записей помогают хранить разные типы записей в разных корзинах. Они отделяют наши обычные записи от других. Очень просто!
Здесь мы создадим плагин для вывода записей нового типа, которые покажут наши кино-рецензии. Давайте начнем.
Откройте свою папку с WordPress плагинами и создайте новую под названием Movie-Reviews .
Откройте папку и создайте PHP файл под названием Movie-Reviews.php .
Откройте файл и добавьте код шапки плагина.
Перед командой закрытия PHP , введите следующую строку кода для того, чтобы выполнять пользовательскую функцию по имени create_movie_review при инициализации каждый раз, когда страница генерируется.
Add_action("init", "create_movie_review");
Выполнение функции create_movie_review :
Function create_movie_review() { register_post_type("movie_reviews", array("labels" => array("name" => "Movie Reviews", "singular_name" => "Movie Review", "add_new" => "Add New", "add_new_item" => "Add New Movie Review", "edit" => "Edit", "edit_item" => "Edit Movie Review", "new_item" => "New Movie Review", "view" => "View", "view_item" => "View Movie Review", "search_items" => "Search Movie Reviews", "not_found" => "No Movie Reviews found", "not_found_in_trash" => "No Movie Reviews found in Trash", "parent" => "Parent Movie Review"), "public" => true, "menu_position" => 15, "supports" => array("title", "editor", "comments", "thumbnail", "custom-fields"), "taxonomies" => array(""), "menu_icon" => plugins_url("images/image.png", __FILE__), "has_archive" => true)); }
Функция register_post_type делает за нас большинство работы. Как только она вызывается, она готовит среду WordPress к новому пользовательскому типу записи, включая разные разделы в админ. части.
Эта функция принимает два аргумента : первый - уникальное имя пользовательского типа записей, а второй - массив, который представляет свойства нового пользовательского типа записей. Вот другой массив, который содержит разные метки, которые обозначают, какие текстовые строки будут отображаться в разных частях пользовательского типа записей, например "name " отображает название пользовательского типа записей в консоли, "edit " и "view " отображаются соответственно в кнопках Edit и View . Думаю, остальное говорит само о себе.
Аргументы :
На странице WordPress Codex о функции register_post_type вы можете прочесть больше об аргументах, которые используются в пользовательских типах записи.
Сохраните иконку размером 16 x 16 px в папку вашего текущего плагина. Это необходимо для иконки пользовательского типа записи в консоли.
Активируйте плагин - и готово, у вас есть новый пользовательский тип записей, у которого есть текстовый редактор, управление публикацией и изображениями, комментариями, а также редактор пользовательских полей.

Щелкните по Add New , чтобы перейти в редактор пользовательского типа записи. Напишите название фильма, рецензию и миниатюру для записи.
Опубликуйте запись и щелкните по View Movie Review , чтобы увидеть созданную кино-рецензию.
Механизм мета-блоков использует помощь встроенной системы мета-блоков WordPress и помогает добавить поля, необходимые для пользовательских типов записей, без необходимых по умолчанию пользовательских полей в редакторе.
Откройте файл Movie-Reviews.php и добавьте следующий код перед закрывающимся PHP тегом. Это регистрирует функцию, которая будет вызвана, когда будет посещен интерфейс администратора WordPress.
Add_action("admin_init", "my_admin");
Добавьте выполнение функции my_admin , которая регистрирует мета-блоки и связывает их с пользовательским типом записей movie_reviews .
Function my_admin() { add_meta_box("movie_review_meta_box", "Movie Review Details", "display_movie_review_meta_box", "movie_reviews", "normal", "high"); }
Здесь функция add_meta_box использована для добавления мета-блоков в пользовательские типы записей.
Атрибуты :
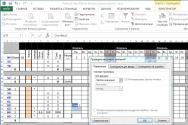
| Movie Director | |
| Movie Rating |
Этот код отображает содержимое мета-блока. Здесь мы использовали объектную переменную, которая содержит информацию о каждой кино-рецензии, которая отображается в редакторе. Используя этот объект, мы получили ID записи и использовали его для запроса в базу, чтобы получить связанное имя режиссера и рейтинг, что привело к отображению полей на экране. Когда новая запись добавлена, get_post_meta возвращает пустую строку, что приводит к отображению пустых полей в мета-блоке.
Эта функция вызывается, когда записи сохраняются в базе данных.
Эта функция выполняется, когда записи сохраняются или удаляются из панели администратора. Здесь после проверки типа полученных данных записи на предмет того, является ли это пользовательским типом записи, проверяется, были ли прикреплены значения к элементам мета-блоков, и затем, наконец, сохраняются значения в эти поля.
При создании пользовательского типа записи мы определили функцию create_movie_review . Удалите элемент custom-fields из массива supports , потому что это больше не нужно. Сейчас если вы сохраните файл и откроете редактор Movie Reviews , вы заметите два поля в мета-блоке под названием Movie Author и Movie Rating . Таким же образом вы можете добавить и другие элементы.
Правильный способ отображения данных пользовательского типа записи - это использование пользовательских шаблонов для каждого пользовательского типа записи. Здесь мы должны создать шаблон, который отображает все кино-рецензии, добавленные с использованием пользовательского типа записи Movie Review .
Откройте файл Movie-Reviews.php и добавьте перед тегом закрытия PHP следующий код. Он зарегистрирует функцию для вызова, когда будет посещен интерфейс администратора WordPress.
Add_filter("template_include", "include_template_function", 1);
Здесь код ищет шаблон single-(post-type-name ).php в папке текущей темы. Если его там нет, он ищет в папке плагина шаблон, который мы предоставили как часть плагина. Зацепка template_include была использована для изменения стандартного поведения и применения специфического шаблона.
После сохранения открытого файла плагина создайте другой PHP файл под названием single-movie_reviews.php и вставьте в него следующий код.
";
}
}
?>
Здесь мы создали базовый шаблон страницы , используя цикл. Функция query_posts получает элементы пользовательского типа записи и отображает их, используя цикл. Конечно, это только базовый цикл, и вы можете играть с ним, как вам вздумается. Вы также можете использовать CSS стили, чтобы форматировать элементы.
Обратите внимание : вам нужно создать новую страницу из консоли, используя созданный только что шаблон.
Вам нужно сохранить два изображения иконок 32 x 32 px в папке вашего плагина. Назовите их icon.png и grey.png . Все, теперь кино-рецензии отображаются на отдельной странице, отсортированные по дате.

В дальнейшем я опишу больше возможностей собственных пользовательских типов, таких как: создание страниц архивов, создание пользовательских таксономий, пользовательских столбцов и так далее.
Мы также включим функцию редактора записей Custom Fields (пользовательские или произвольные поля) для каждого типа и отобразим поля в новых шаблонах.
В WordPress пользовательские типы записей дают вам полный контроль над тем, как отображать контент вашим пользователям. Если вы создаёте записи в своём блоге, вы можете создать индивидуальные стили только для них. Если вы пишете отзывы о музыке или фильмах, вы можете добавлять дополнительные области для ввода в нужных публикациях, и они не будут отображаться в других публикациях блога.
Но прежде чем мы продолжим, давайте разберёмся с тем, что такое пользовательские записи.
Если коротко, то произвольные типы записей WordPress позволяют вам сортировать публикации по их содержимому. В WordPress типы публикаций по умолчанию: Запись, Страница, Медиафайлы и др.
Обычно вы пишете все ваши публикации в разделе Записи в админ консоли, затем присваиваете им категорию. Все записи различных типов находятся в одном списке, что затрудняет их различие по типу содержимого.
Произвольные типы записей со своими собственными ссылками в админ консоли ведут вас к списку записей этого типа. Созданным таким образом публикациям могут быть присвоены категории, такие как обычная запись, поэтому у вас есть абсолютная свобода сортировать и представлять публикации любым способом.
В примере выше, если пользователь перейдёт в раздел базы данных фильмов (movie) на вашем сайте, публикации с отзывами (review) не будут включены. Если вы, к примеру, сделаете категории ‘Action’ и ‘Romance’, ваши пользователи смогут пойти в категорию фильмов Action и увидеть все отзывы и фильмы категории.
Когда создаёте новый тип публикации, у вас есть множество настроек, таких как: где в админ-меню будет расположена ссылка, будет ли этот тип включён в результаты поиска, будет ли поддерживаться отображение фрагмента текста, разрешены ли комментарии и так далее.
Вы можете изменить различные тексты названий (заданные с использованием массива $labels ), такие как переименовать Add New Post в Add New Movie . Например, вы можете переименовать текст Featured Image (Изображение записи) в Add Poster (Добавить постер) .
Вы также можете включить функцию пользовательских полей в своём редакторе публикаций, которая по умолчанию спрятана и должна быть включена при помощи ссылки Screen Options вверху редактора.
Продолжая пример с Movies и Movie Reviews, публикации Movie могут добавлять пользовательские/произвольные поля для таких параметров как год выпуска, режисёр, рейтинги многие другие с кратким обзором фильмы в виде содержимого записи.

Обычно любое поле, которое вы создадите, доступно в любом типе записей, поэтому плагин требует ограничений для каждого поля, где ему быть доступным.
Когда вы создаёте значительные изменения в WordPress, одним из доступных вариантов реализации является создание плагина . Вы также можете создавать новые произвольные типы записей в файле functions.php . Для этого руководства мы создадим плагин и продолжим использовать пример с базой данных movie/reviews (фильмы/отзывы).
Для создания пользовательского типа записи нужно написать несколько функций, которые вызывают функцию WordPress с названием register_post_type() с двумя параметрами. Ваша функция должна быть привязана к хуку действия(action hook) init , иначе произвольный тип записи не будет зарегистрирован верно.
// The custom function MUST be hooked to the init action hook add_action("init", "lc_register_movie_post_type"); // A custom function that calls register_post_type function lc_register_movie_post_type() { // Set various pieces of text, $labels is used inside the $args array $labels = array("name" => _x("Movies", "post type general name"), "singular_name" => _x("Movie", "post type singular name"), ...); // Set various pieces of information about the post type $args = array("labels" => $labels, "description" => "My custom post type", "public" => true, ...); // Register the movie post type with all the information contained in the $arguments array register_post_type("movie", $args); }
Все пользовательские функции должны иметь префикс, чтобы избежать конфликтов с другими плагинами или функциями темы. Здесь будет использоваться префикс LC.
Два параметра для функции register_post_type() это:
Наиболее часто используемые ключи для массива $args показаны ниже, все не являются обязательными:
Первый ключ в массиве $args называется labels (ярлыки) и должен быть массивом. Он задаёт различные фрагменты текста, относящиеся к типу записи. Так как здесь может быть много данных, лучше всего создать массив с названием $labels для их хранения. Приведенный выше код немного проясняет, что это значит.
Ниже представлены некоторые важные ключи для массива labels, все не являются обязательными:
Один из ключей в массиве $args называется supports . Это простой массив, где вы записываете список функций редактора записи, которые вы хотите включить для своего типа записи. По умолчанию только название (title) и редактор (editor) включены.
Вы также можете поставить FALSE вместо массива, для отключение всех функций редактора, выключая и title, и область добавления контента. Это означает, что запись не может быть отредактирована, но по прежнему полностью видна.
Вот перечень функций, которые вы можете включить в массиве $supports :
Теперь, когда мы знаем, какие параметры нужны для функции, мы можем создать свой плагин, написать собственную функцию и прикрепить её к событию init .
lc_custom_post_movie() to the init action hook add_action("init", "lc_custom_post_movie"); // The custom function to register a movie post type function lc_custom_post_movie() { // Set the labels, this variable is used in the $args array $labels = array("name" => __("Movies"), "singular_name" => __("Movie"), "add_new" => __("Add New Movie"), "add_new_item" => __("Add New Movie"), "edit_item" => __("Edit Movie"), "new_item" => __("New Movie"), "all_items" => __("All Movies"), "view_item" => __("View Movie"), "search_items" => __("Search Movies"), "featured_image" => "Poster", "set_featured_image" => "Add Poster"); // The arguments for our post type, to be entered as parameter 2 of register_post_type() $args = array("labels" => $labels, "description" => "Holds our movies and movie specific data", "public" => true, "menu_position" => 5, "supports" => array("title", "editor", "thumbnail", "excerpt", "comments", "custom-fields"), "has_archive" => true, "show_in_admin_bar" => true, "show_in_nav_menus" => true, "has_archive" => true, "query_var" => "film"); // Call the actual WordPress function // Parameter 1 is a name for the post type // Parameter 2 is the $args array register_post_type("movie", $args); } // Hook lc_custom_post_movie_reviews() to the init action hook add_action("init", "lc_custom_post_movie_reviews"); // The custom function to register a movie review post type function lc_custom_post_movie_reviews() { // Set the labels, this variable is used in the $args array $labels = array("name" => __("Movie Reviews"), "singular_name" => __("Movie Review"), "add_new" => __("Add New Movie Review"), "add_new_item" => __("Add New Movie Review"), "edit_item" => __("Edit Movie Review"), "new_item" => __("New Movie Review"), "all_items" => __("All Movie Reviews"), "view_item" => __("View Movie Reviews"), "search_items" => __("Search Movie Reviews")); // The arguments for our post type, to be entered as parameter 2 of register_post_type() $args = array("labels" => $labels, "description" => "Holds our movie reviews", "public" => true, "menu_position" => 6, "supports" => array("title", "editor", "thumbnail", "excerpt", "comments", "custom-fields"), "has_archive" => true, "show_in_admin_bar" => true, "show_in_nav_menus" => true, "has_archive" => true); // Call the actual WordPress function // Parameter 1 is a name for the post type // $args array goes in parameter 2. register_post_type("review", $args); }
Ели вы включите этот плагин, то увидите новую ссылку в панели навигации админ консоли, сразу после ссылки Записи.
При наведении мыши будет показаны пункты меню ‘View All’ (Показать все) и ‘Add New’ (Добавить новую), текст будет соответствовать тому, который был задан в массиве $labels . Посмотрите в редакторе, где изменились ссылки.
При добавлении своих полей в запись поля сохраняются и вы можете быстро добавить любое к новой записи. Произвольные поля, которые вы добавили будут появляться в выпадающем списке каждой записи. Это может затруднить поиск нужного поля в определённых типах записей. Если вы хотите ограничить произвольные поля, чтобы они были доступны только для отдельных типов записей, то самый простой способ – через плагин.
ID, "Box Art", TRUE); if (!empty($movie_box_art)) { ?>ПРИМЕЧАНИЕ: Вы можете создать несколько настраиваемых полей с тем же именем и разными значениями. Если существует несколько полей с одинаковым именем, установка FALSE вернёт их массив.
 " alt=" ">
Поскольку функция get_post_meta() возвращает значение, вы можете использовать значение в условном выражении для соответствующего изменения внешнего вида.
В примере выше мы проверяем, содержит ли фильм (movie) box art, назначенный ему в виде произвольного поля. Если $movie_box_art не пустое, вывести div и image.
Плагин Advanced Custom Fields предлагает свои собственные функции и шорткоды для отображения полей.

Отображает значение указанного поля, вы должны использовать имя поля (Field Name), которое вы указали при создании группы полей.
Возвращает значение указанного поля, удобно для условных выражений.
Это те функции, которые вам, скорее всего, понадобятся. Есть много дополнительных функций, и вы можете найти их в .
Вы можете отображать поля непосредственно в записи, используя шорткод выше.
Пользовательские типы записей не отображаются на главной странице по умолчанию, поэтому вам нужно создать новую функцию, которая вызывает установленный метод объекта WP_Query WordPress.
Функция проверяет, находится ли посетитель на главной странице, и является ли активный запрос основным, созданным WordPress.
$query->set() принимает два параметра:
В примере кода выше массив начинается с ‘post’ – вот почему каждая запись WordPress имеет тип ‘post’ и мы всё ещё хотим включить её на главной странице.
Если на главной странице вы хотите использовать только пользовательские записи заданного типа, вы можете удалить‘posts’ и использовать свой собственный тип сообщений.
Значение, которое вы вводите должно соответствовать параметру 1 функции register_post_type() .
В этом руководстве, мы показываем как создать пользовательские типы и какие данные вам нужно иметь для этого. Гибкость произвольных типов публикаций предоставляет ценную функциональность для любого сайта на WordPress.
Однажды Вы решили создать свой сайт или блог, а для системы управления Вы выбрали WordPress…Прошло время ваш сайт становится все более и более читаемым и тут, вы поняли, что для ещё большей популярности необходимо добавить немного функционала к сайту или же просто автоматизировать какое-то действие.
Вы идете на «склад» плагинов для wordpress и обнаруживаете, что необходимого плагина для Вас нету. Что же делать? Как быть? Если вы хотя бы немного знакомы с азами программирования на php, верстке, то Вам не составит труда Самому написать плагин для WordPress .
А теперь отправимся на «кухню» для приготовления нашего плагина.
P.s. Если знаний в php и верстке нету… не расстраивайтесь, попросите кого-либо написать Вам нужный функционал 🙂
Прежде чем начать писать плагин необходимо обратится в документацию WordPress где описаны основные принципы написания плагинов и некоторые примеры кода.
Я не буду дублировать эту информацию, а сразу перейду непосредственно к написанию кода.
Напишем простенький плагин, который позволит сохранять и выводить отзывы о Вашем сайте. Конечно, такие плагины уже есть, но для примера сойдет как раз.
Первое, что мы сделаем, это придумаем уникальное название нашему плагину - «AdvUserReviews «.
Далее создадим в директории Вашего сайта «/wp-content/plugins/» новую директорию «advuserreviews». И в ней создадим файл «advuserreviews.php». Это будет основной файл, который будет отвечать за общею инициализацию. (Желательно используйте кодировку для файлов UTF-8).
В самом начале файла необходимо указать основную информацию о плагине
Теперь, если перейти в панель управления, то можно увидеть, что система нашла новый плагин и предлагает его активировать. Но пока что это делать рано.
Наш новый плагин мы будем писать в стиле ООП и вся обработка данных будет находится в одном файле. Создадим основной каркас файла.
// Stop direct call if(preg_match("#" . basename(__FILE__) . "#", $_SERVER["PHP_SELF"])) { die("You are not allowed to call this page directly."); } if (!class_exists("AdvUserReviews")) { class AdvUserReviews { // Хранение внутренних данных public $data = array(); // Конструктор объекта // Инициализация основных переменных function AdvUserReviews() { } } } global $rprice; $rprice = new AdvUserReviews();
Теперь конструктор объекта дополним следующим кодом:
Function AdvUserReviews() { global $wpdb; // Объявляем константу инициализации нашего плагина DEFINE("AdvUserReviews", true); // Название файла нашего плагина $this->plugin_name = plugin_basename(__FILE__); // URL адрес для нашего плагина $this->plugin_url = trailingslashit(WP_PLUGIN_URL."/".dirname(plugin_basename(__FILE__))); // Таблица для хранения наших отзывов // обязательно должна быть глобально объявлена перменная $wpdb $this->tbl_adv_reviews = $wpdb->prefix . "adv_reviews"; // Функция которая исполняется при активации плагина register_activation_hook($this->plugin_name, array(&$this, "activate")); // Функция которая исполняется при деактивации плагина register_deactivation_hook($this->plugin_name, array(&$this, "deactivate")); // Функция которая исполняется удалении плагина register_uninstall_hook($this->plugin_name, array(&$this, "uninstall")); }
В конструкторе объекта мы используем 3 «хука» или «зацепки» (что это?): register_activation_hook , register_deactivation_hook и register_uninstall_hook - это функции, которые выполняются при активации, деактивации плагина и его удаления соответственно.
Теперь непосредственно реализуем эти функции.
/** * Активация плагина */ function activate() { global $wpdb; require_once(ABSPATH . "wp-admin/upgrade-functions.php"); $table = $this->tbl_adv_reviews; // Определение версии mysql if (version_compare(mysql_get_server_info(), "4.1.0", ">=")) { if (! empty($wpdb->charset)) $charset_collate = "DEFAULT CHARACTER SET $wpdb->charset"; if (! empty($wpdb->collate)) $charset_collate .= " COLLATE $wpdb->collate"; } // Структура нашей таблицы для отзывов $sql_table_adv_reviews = " CREATE TABLE `".$wpdb->prefix."adv_reviews` (`ID` INT(10) UNSIGNED NULL AUTO_INCREMENT, `review_title` VARCHAR(255) NOT NULL DEFAULT "0", `review_text` TEXT NOT NULL, `review_date` TIMESTAMP NOT NULL DEFAULT CURRENT_TIMESTAMP, `review_user_name` VARCHAR(200) NULL, `review_user_email` VARCHAR(200) NULL, PRIMARY KEY (`ID`))".$charset_collate.";"; // Проверка на существование таблицы if ($wpdb->get_var("show tables like "".$table.""") != $table) { dbDelta($sql_table_adv_reviews); } } /** * Деактивация плагина */ function deactivate() { return true; } /** * Удаление плагина */ function uninstall() { global $wpdb; $wpdb->query("DROP TABLE IF EXISTS {$wpdb->prefix}adv_reviews"); }
Переменная $wpdb отвечает за запросы к базе Данных. Функция dbDelta анализирует текущую структуру таблицы, сравнивает ee с желаемой структурой таблицы, и либо добавляет или изменяет таблицу по мере необходимости.
Соответственно, при активации плагина создается структура таблицы для хранения отзывов. При деактивации плагина не происходит никаких действий, а вот при удалении мы удаляем нашу таблицу. Более подробно действия можно понять по исходному коду.
Основная структура нового плагина готова. Теперь необходимо приступить к написанию функциональной части. Для этого в конструктор класса нам необходимо добавить следующие строчки кода:
// Если мы в адм. интерфейсе if (is_admin()) { // Добавляем стили и скрипты add_action("wp_print_scripts", array(&$this, "admin_load_scripts")); add_action("wp_print_styles", array(&$this, "admin_load_styles")); // Добавляем меню для плагина add_action("admin_menu", array(&$this, "admin_generate_menu")); } else { // Добавляем стили и скрипты add_action("wp_print_scripts", array(&$this, "site_load_scripts")); add_action("wp_print_styles", array(&$this, "site_load_styles")); add_shortcode("show_reviews", array (&$this, "site_show_reviews")); }
Разберем подробнее данный участок кода. Начнем с панели администрирования.
Функция «is_admin
» проверяет в каком режиме сейчас мы работаем - на сайте или в панель управления.
Далее используется несколько хуков, для функций:
Каждому хуку соответствует реализованный метод в нашем классе. В котором выполняются необходимые операции.
Рассмотрим код для подключения стилей и скриптов
/** * Загрузка необходимых скриптов для страницы управления * в панели администрирования */ function admin_load_scripts() { // Регистрируем скрипты wp_register_script("advReviewsAdminJs", $this->plugin_url . "js/admin-scripts.js"); wp_register_script("jquery", $this->plugin_url . "js/jquery-1.4.2.min.js"); // Добавляем скрипты на страницу wp_enqueue_script("advReviewsAdminJs"); wp_enqueue_script("jquery"); } /** * Загрузка необходимых стилей для страницы управления * в панели администрирования */ function admin_load_styles() { // Регистрируем стили wp_register_style("advReviewsAdminCss", $this->plugin_url . "css/admin-style.css"); // Добавляем стили wp_enqueue_style("advReviewsAdminCss"); }
Здесь используются следующие функции.
Каждое действие зависит от переданного параметра «action», соответственно «edit» -редактирование отзыва, «submit» - сохранение отредактированного отзыва и «delete» - удаление отзыва.
Обмен данными со страницами отображения происходит через свойство объекта «data». Исходный код этих страниц будет выложен в архиве с данным модулем в конце статьи. Тут я их не буду вставлять, так как топик уже оказался достаточно большим.
На этом с панелью администрирования заканчиваем и переходит к отображению и добавлению отзывов со стороны пользователей.
Что бы указать wordpress, когда вызывать наш плагин, необходимо зарегистрировать «shortcode», что и было сделано в конструкторе нашего класса. Подробнее об этом .
Add_shortcode("show_reviews", array (&$this, "site_show_reviews"));
Теперь на любой странице сайта можно разместить вот такой код и это заставит выполнить указанную нами функцию (передается вторым параметром). Ниже представлен исходный код данной функции.
/** * Список отзывов на сайте */ public function site_show_reviews($atts, $content=null) { global $wpdb; if (isset($_POST["action"]) && $_POST["action"] == "add-review") { $this->add_user_review(); } // Выбираем все отзывы из Базы Данных $this->data["reviews"] = $wpdb->get_results("SELECT * FROM `" . $this->tbl_adv_reviews . "`", ARRAY_A); ## Включаем буферизацию вывода ob_start (); include_once("site_reviews.php"); ## Получаем данные $output = ob_get_contents (); ## Отключаем буферизацию ob_end_clean (); return $output; } private function add_user_review() { global $wpdb; $inputData = array("review_title" => strip_tags($_POST["review_title"]), "review_text" => strip_tags($_POST["review_text"]), "review_user_name" => strip_tags($_POST["review_user_name"]), "review_user_email" => strip_tags($_POST["review_user_email"]),); // Добавляем новый отзыв на сайт $wpdb->insert($this->tbl_adv_reviews, $inputData); }
В принципе тут ничего сложного нету - делается SQL запрос на выборку данных, если же передан параметр «action», то сначала добавляется новый отзыв. Но стоит обратить внимание на буферизацию вывода. Она необходима для того, что бы получить данные вставляемой страницы.
Вот собственно и все. Теперь можно посмотреть, что у нас получилось. А скачать плагин и исходные коды можно вот .
Само собой это только пример создания плагина, но и сойдет как простая гостевушка, если ее немного доработать, например, добавить защиту от ботов и постраничный вывод. Удачного кодинга:)
Форма на сайте:
 Панель управления плагином:
 Редактирование отзыва:


Get a valuable feedback from your customers by giving them the freedom to share their impressions freely. Let them rate your products and/or services straight on your website. See below the key features that come standard with our online review system.
Reviews & Ratings
Embed PHP Review Script into your website and let clients share their experience with the products and services you offer. They can rate by criteria and give both positive and negative feedback.
Multiple Languages
The PHP review system can speak not only English, but any language you may need. You can translate all titles and system messages from the admin page using unique IDs for each piece of text.
Editable Rating Criteria
Depending on the type of business, review system admins can
set different rating criteria to be shown in the front-end form.
Each of these criteria is rated with 1 to 5 stars.
Email & SMS Notifications
Set up the online review system to send Email & SMS alerts when a new review has been posted. You can easily specify which users to receive these messages from the Users menu.
Multiple User Types
Create unlimited client types depending on the industry and services used. Hotel ratings can go with following user types: Family with kids, Couple, Business trip etc. They appear as labels in the reviews.
Responsive & Attractive
The review and rating script runs on all devices, seamlessly adapting to various screen sizes. In accord with your website branding, you can pick the best matching front-end theme among 10 color options.
A quick tips box next to the review form allows you to add some witty words and draw customers out. The review system filters reviews by user type. Customers can rate other clients" ratings, too.
With a Developer Licence you get the source code and can make any custom changes to the PHP Review Script. We can also modify the customer review system upon request.